Tostones
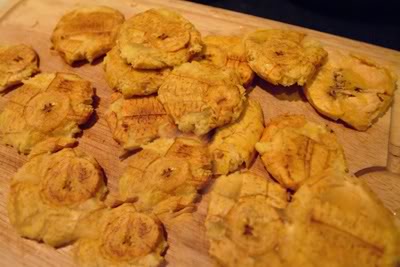
There has been a lot of talk lately about ‘comfort foods.’ Foods like meatloaf and mac and cheese. Some upscale restaurants have even added classic comfort foods to their menus because who doesn’t love a bowl of creamy mac and cheese. But growing up in a Puerto Rican household one of the foods that comforted me the most was tostones or twice fried plantains. My mom made the best tostones: golden crispy discs smothered in crushed garlic and olive oil. Yummy!
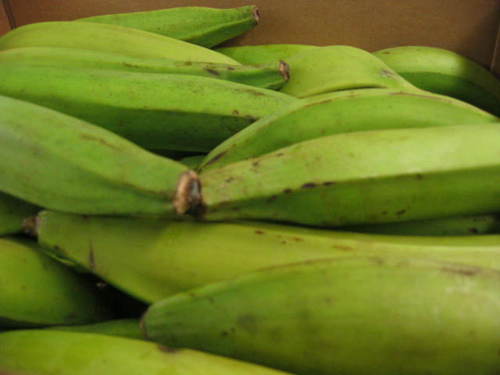
In the last several years more and more grocery stores have started to carry plantains, both green and yellow, in their produce departments so they’re very easy to find. You may have even passed them in your local store but were hesitant to pick one up because you didn’t know what to do with them! I’m here to help you with that dilema. Make tostones! They are made using green plantains.
First you want to start by heating approximately 2 cups of corn oil in a skillet, a large one works best. I use corn oil because that’s what mami used and the tostones just taste better. Next you want to peel the plantain. Peeling a plantain can be a chore for some but I find that cutting into it lengthwise, letting the tip of your knife go in only about an 1/8 of an inch deep, then running it under cold water for a few seconds helps to looses the touch exterior. Chef Nadine Nelson of Roxbury taught me that trick. Then using the tip of your knife slowly start to peel back the skin to reveal the banana. Take your time when you first start. It may take you a couple of tries to get this technique down but it’s worth the time.
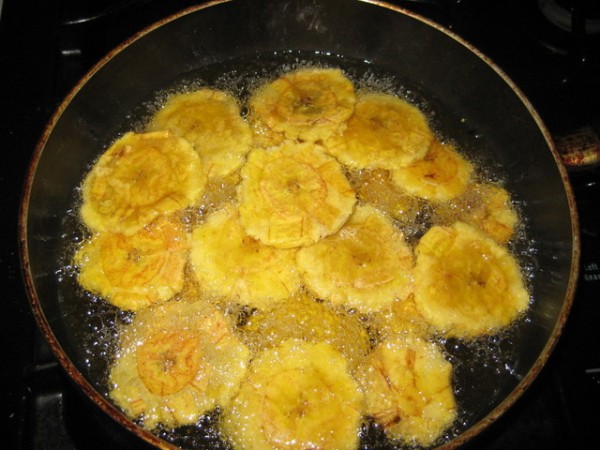
Slice the banana into 1 inch rounds and fry in the corn oil until both sides are golden but not brown, about 3 minutes. As they begin to color on both sides remove the rounds to paper towels to drain. The next step can be done in a couple of ways. You can go out and spend money on a tostonera, which is a wooden tool used to smash the rounds into discs but I find a paper bag and a heavy bottomed glass cup or bottle works just fine.
If you choose my method simply place the golden round in between two pieces of brown paper and smash into a disc then return them to the hot oil and fry them for another 3 minutes or until they are golden and crispy. Drain the tostone on paper towels and season with kosher salt. Serve immediately. Tostones are not meant to be eaten cold or reheated. It’s just not the same.
Tostones are wonderful as is, fresh from the pan and sprinkled with salt but they can also be used as a bed for other wonderful ingredients like salsa fresca, guacamole, or crushed garlic. They’re superb as an hors d’oeuvre for a cocktail party. Tostones and mojitos perhaps? Share them with your friends and family at your next gathering. And make plenty because these little suckers go fast!
My Summer Zucchini Bread
The summer season has officially come to a close but the thermometer still says it’s summer here in Boston. Maybe it’s because we got a late start to our summer. The entire month of June was one messy rainstorm after another. But once July came around things began to happen in my garden. I took advantage of all the fresh produce at my disposal, even sneaking into other gardens to sample their treasures. Shhh! Don’t tell!
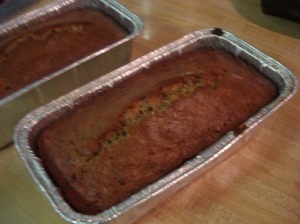
One of the most abundant veggies was zucchini. So much zucchini I didn’t want any of it to go to waste so I made all sorts of scrumptious dishes with it but my most requested culinary creation was my zucchini bread. I eventually started baking two and three loaves at a time so there was plenty to go around. I found the basic recipe in one of my many cookbooks but I put my own spin on it and it quickly became one of my most requested baked goods. The recipe is very simple but very delicious and what you get is a beautiful brown bread that is moist and tender. I promise you there won’t be a crumb left of my Summer Zucchini Bread!
The toasted walnuts and chocolate chips are optional but you have to agree anything made with nuts and chocolate is that much better. I suggest making three batches of the bread batter: one without nuts & chocolate, one with just nuts & one with both. This way you please everyone’s tastes and you’ll be a big hit!
Make this bread for your family, make it to say thank you to someone who helped you out in some way, make it and bring it to work and earn a few extra brownie points, or make several mini loaves and freeze them for the holidays!
Ingredients:
- 1/4 cup of unsalted butter at room temperature
- 1/4 cup of vegetable oil
- 1 cup light brown sugar
- 1 1/2 cups A/P flour
- 1 tsp ground cinnamon
- Pinch of nutmeg (fresh grated is best)
- 1/2 tsp baking soda
- 1 tsp baking powder
- 1/2 tsp salt
- 1 egg
- 1 cup finely shredded zucchini (squeezed & drained of all water)
- 1/4 cup sour cream
- 1/2 cup toasted walnut pieces (optional)
- 1/2 teaspoon lemon zest
- 1 tsp vanilla extract
1/4 cup chocolate chips (optional)
Start by preheating your oven to 350 degrees. This recipe makes about 6 cups of batter so it works really well in an 8×4 loaf pan. Make sure you grease and flour the pan. Sift all of your dry ingredients together. This is a very important step as it makes the bread light. Next cream the butter, sugar and oil until the mixture is smooth and fluffy. Add the egg, vanilla and sour cream to this mixture and combine until blended. The original recipe says you can use a mixer to combine the wet and dry I prefer to do it by hand. I fold the dry mixture into the wet about 1/2 cup at a time. Finally add the grated zucchini, walnuts, chocolate chips and lemon zest to the batter. Pour this into your prepared pan and bake for about 50 minutes or until a cake tester comes out clean. You’re going to want to dive into your bread right away but it’s best to let it sit and cool for about 10 minutes, then have at it!
